UNO Q camera board: a seemingly simple project
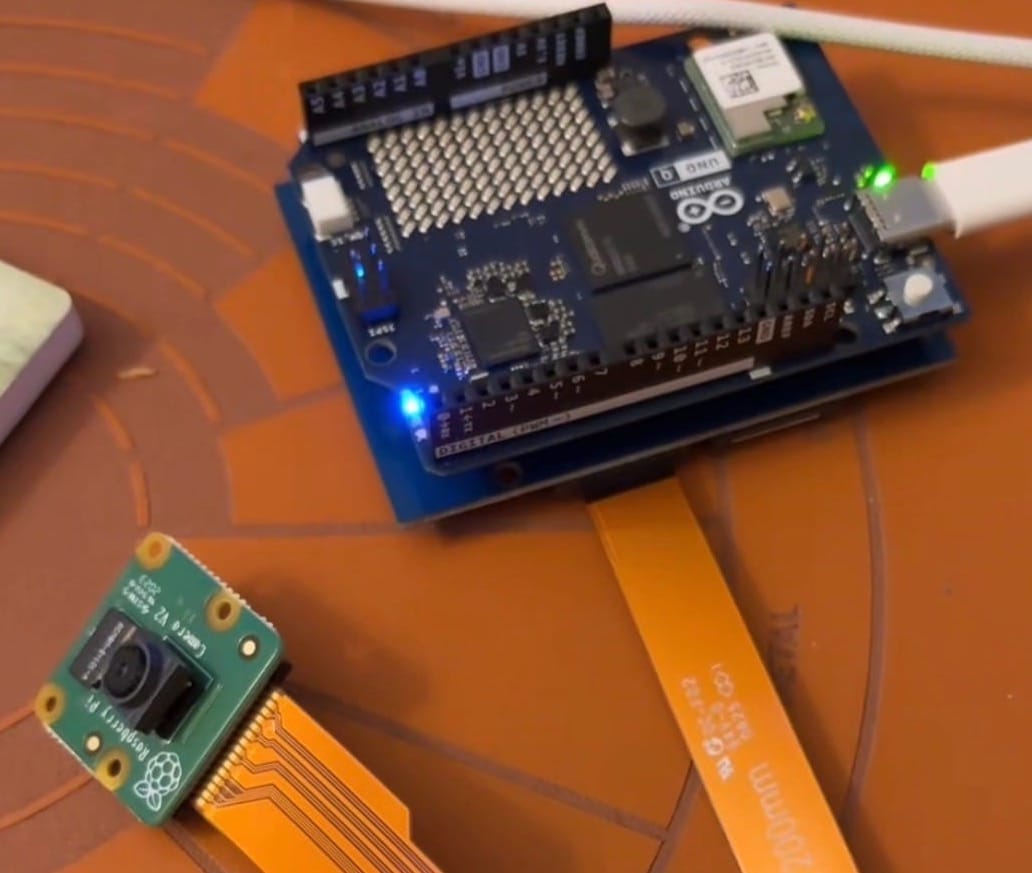
Having bought an Arduino UNO Q, I set out on a seemingly simple project: a camera breakout board. A simple board for hooking up the Raspberry Pi cameras I've collected over the years.
The board mainly required a breakout to flexible cable connectors used by the Pi's camera boards. The only other requirement was converting between 1.8V to 3.3V on some signals. This could be done with a simple voltage converter, of which I chose the TXB0104 series for.
Beyond that, not much was needed. Mostly everything else could be handled by software...
However, bring-up of the board has been somewhat slow. This is mainly due to some restrictions on the UNO Q (at the moment). These include:
- Device tree overlays disabled by default
- Only certain camera drivers installed on the UNO Q
- An unclear software stack on top of the camera low-level software
To date, many of these have been handled with some clever workarounds and some deep dives into these subjects. Many of which I had only cursorily known about before. So, that is a very much a positive. I also learned how much the Raspberry Pi shields you from these low-level workings. Most notably, the device tree.
Handling the device tree
On a Raspberry Pi, the device tree is handled in a simple manner with a config.txt. On the UNO Q, one needs to directly deal with these. And, as mentioned before, the device tree overlays were disabled in the kernel by default. So, to handle this, one has to edit the primary device tree loaded at boot.
Luckily, there is a way to apply your own, custom device tree to the boot system. The UNO Q uses a Debian Trixie Linux that uses a UEFI boot that has a .conf file hidden under /boot/efi/loader/entries. Within that file, one can specify where to load a .dtb device tree file from.
To make the custom device tree, it turns out I also had a reference already loaded on the machine. Within /boot/efi/dtb/qcom there are a bunch of device trees specific to the UNO Q. Specifically ones starting with the name qrb2210. And, one of these happened to include a Raspberry Pi V2 example. Albeit, it needed to be edited to match my specific GPIOs. But, after that, the camera was detected.
It took almost two weeks to get to that point, which led me to jump out of my seat once the camera was detected.
Trying to snap a picture: media-ctl and v4l2-ctl
The next step, take a picture. As it turns out, this isn't that straight forward. There are a number of software packages that sit between your final python program and the camera. Two of these are v4l2-ctl and media-ctl.
I cannot say I know too much more about this, as I did find another work around. However, I spent many sessions with Gemini and ChatGPT. I even ended up in corners of the internet that appeared to be from the 1990's. Just have a look at kernel.org when you get a chance.
I'll save you the story here, but you should be aware that these are not for the faint-hearted. Each of these software packages work in conjunction and in a pipeline. Within them, the image must be passed through many steps and must be correctly formatted to get anything to work.
However, it turns out some people have worked through this hard problem and have built out software on top.
Taking the easy way out
I quickly found that working in headless mode on the UNO Q was slowing me down. Not only did I have to stream from the camera, but I also had to figure out the pipeline for saving images. If I had access to a display, I could view the camera output directly on the display without going through the trouble of saving images.
So, I quickly set it up as a Single Board Computer (SBC) with a keyboard, mouse, and display. It turns out that one can view the image a little easier with a simple command: qcam .
This will stream directly to your display. Great!
Well, now, how to view in a python program? Well, it turns out that by installing a couple of libraries allowed me to stream using OpenCV. I'll save that for another post. However, if you buy the camera board you will receive example software as well to walk you through the process